Yes, jblaine, the updates are coming! 😉 Waiting for more decals before I take pics of the car (RiCE) and also finally got my main machine back from repair (was out of commission for three weeks). Wheee.
All posts by Sean Sosik-Hamor
How to paint a rally car…
 The car is finally painted! The blue looks pretty decent and here’s a quickie rundown on car preparation…I’ll have a complete 50/50 (looks good at 50 MPH from 50 feet away) paintjob howto put together once I’m finished. In a nutshell:
- Use 60 grain dry sandpaper on a handheld electric sander ($20) or, if you can afford it, random orbit sander with dust trap ($150). Sand through the clearcoat until you hit paint. Here I am prepping Kris’ rally Neon…notice the “white” dust. This is clearcoat dust…when the dust turns red, you’ve hit paint.
- Use 220 grain dry sandpaper on the same sander to smooth out the scrapes from the 60 grain and remove the swirl marks. Hitting the white electrically applied factory primer is good…hitting metal is bad but not Earth shattering.
- Drill holes and use a dent puller to yank out huge dents. Sand to bare metal then use a ball hammer to whack the holes back in. Sealer should then be used on the inside to reduce the chances of rust (I forgot to do this because I suck).
- Start Bondo body work where required. Scrape up with 60 grain and apply Bondo. Form Bondo with 100 grain. Smooth with 220 grain. 220 grain still leaves a rough surface but this is good…we want a hardcore tough paintjob, not a show paintjob.
- Use Bondo Finishing Putty to fill in all the air bubbles in the Bondo. It’s impossible to apply Bondo 100% smooth when you first start working with it.
- Prime all areas to be painted with Duplicolor Filler Primer or Plasti-kote Filler Primer. The filler primer is thicker, runs less and fills in the rough spots from sanding. I coat the entire car and then immediately start over from the beginning with a second coat while the first coat is still tacky.
- Let the car flash for 15 minutes until a dry skin forms over the primer and then repeat the two medium coats again. Let dry overnight, preferably a week or two to bake in the sun.
- Wet sand primer with 600 grain.
- Thoroughly wash car with automotive car wash fluid and tar/wax stripper.
- Spray down walls of painting area with water to reduce dust. Let car dry, use cotton lint-free towels.
- Use Prep-All or any other alcohol based paint prep solution to remove all residue and dust.
- Fire up compressor to full capacity at 60 PSI blow. Mix paints. MSA acrylic enamel requires a 8 parts paint to 4 parts reducer to 1 part hardener.
- Use cardboard or wood to test your spray pattern. It takes a while to get the proper air pressure to air flow to spray pattern mix.
- Blow down color just like the primer…coat the entire car with a light to medium coat so you can still see primer. Go back and do the entire car again immediately with a medium coat so you can’t see primer anymore.
- Let car flash for 10 to 15 minutes until a skin forms and is just barely tacky…if you press your finger will get wet. Spray down car again with two medium coats.
- This should be enough, let dry with an exhaust fan overnight. Move car outside the next day and let bake in the sun.
Blowing some white…
 I finally got around to blowing down the white paint this weekend and it turned out quite well! With the exception of some paint drips where the consistency of the paint changed between batches I’m very pleased with the results. I was using an 8 to 4 to 1 mix of MSA fleet paint to MSA standard reducer to MSA hardener with a siphon feed spray gun and compressor. Check out the full gallery!
Stickers are so rice!
The car has been mostly primered and needs to be wet sanded before paint application. We have received our SCCA ClubRally VID decal pack and have been assigned car #762. Kris Marciniak, in his Neon, has been assigned car #761.
First damage collected…
The car picked up its first damage this morning…and wasn’t even out on a stage! One of my neighbors backed into it this morning and pushed the left rear door in about eight inches. No proof yet…but the neighbors have hit our cars before. I’ll check for matching damage on their rear bumpers when I get home tonight.
Off to Maine Forest Rally…
We’re leaving Thursday for Maine Forest Rally. Not driving, just spectating. We should get some spectacular photos and video!
Ghettotastic blingalicious Krylon paintjob!
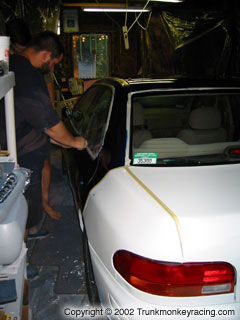
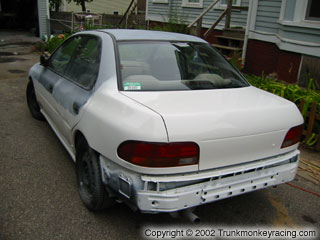
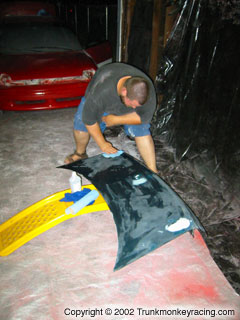
 I started preparing the Impreza for a full body repaint on Sunday and have the first layers of primer and white on the trunk. The Pontiac Grand Am spoiler has also been removed and the rusted out convex holes were banged down and repaired with Bondo. The rear quarters and bumper should be a nice shade of primer come Sunday.
We’ll be doing a paintjob similar to Kris’s Production class Neon, except we’ll be doing blue and white with white wrapping up over the trunk and roof similar to Realtime Racing’s scheme.
75000 mile service completed last week…
I took care of the 75k mile service last week up at Exeter Subaru and, with the help of Ian, found quite a few things wrong with the car. Overall, the service came to around $750 after the NESIC discount due to additional parts and labor that needed to be performed. What follows is a stream of consciousness overview of what is wrong with the car and needs to be looked at immediately.
- Clutch: The clutch is completely flattened and is starting to slip under any torque in first, second and third gears. The clutch and flywheel will be replaced with lightened trackable street parts so the car will still bearable on the street. The pressure plate is in unknown condition so it may be replaced as well.
- Lower Crossmember and Oil Pan: The car had a previous impact on the crossmember and the oil pan is out of a 94 Impreza.
- Rear Motor Seals: The rear seals on the motor are leaking and Exeter will be taking care of them when they crack the transmission open to replace the clutch, flywheel and pressure plate.
- Spark Plugs: The spark plugs were less than finger tight and two of the four plugs had signs of blowby. They have since been replaced.
- Oil Pump: The oil pump was spewing oil all over the place and was replaced. A rebuild is possible because it’s only a screw that has come loose so it looks like we have a spare.
- Oil Filter: The old oil filter was extremely gunked up and corroded because it was finger tight and leaking oil all over the place. It spewed over two quarts between CT and NH when the car was driven home the first night.
- Oil Filler Tube: The 710 cap was on so tight it needed to be forcefully extracted using the tire as a wedge after the oil filler tube was removed. I tightened it down lightly and Ian at Exeter had to forcefully remove it. It will be replaced eventually.
- Suspension: It looks like I’ll be getting the KYB AGX setup with Ground Control coilovers with adjustable collars to run with temporarily until the first ClubRally. Right now the 5Zigen springs on the stock blown struts are unbearable and the car is extremely twitchy.
- Alignment: The steering wheel is off by about two degrees and the car needs to be fully aligned after the new suspension goes on.
- Bulbs and Lenses: Fluorescent lighting covers were cut to fit the front turn signals to simulate JDM clears and were cracked. The stock orange lenses were reinstalled this weekend. The clear corners and clear side markers may be sold and replaced with stock to raise funds.
- Rear Bumper: The rear bumper is extremely scratched along the bottom edge and it looks like it scraped along the ground when it got pulled up onto a flatbed…I can’t see any other way for the damage to get there. Also, a coat hanger was being used to hold the rear bumper in place. Ghettobling!
- Brakes: The brakes are extremely worn and need to be replaced in the next month or so. Still looking into the PGT legality of a rear disc conversion. It appears that the front pads are EBC Red Stuff which accounts for the rotors overheating and awful brake fade. The brakes are much better since the brake fluid replacement, however.
There are quite a few other things but that’s all I could immediately think of off the top of my head. More will be added later.
Stock airbox reinstalled.
I took fifteen minutes this evening after it stopped raining to go out and put the stock airbox back into the car. The K&N Filtercharger with poorly-fitted air horn adapter and ghettotastic Home Depot sheet metal and weatherstripping “cold air box” came out and the car now has its torque restored down low and the hesitation between 3.5k and 4k RPM is now gone.
The car is now all legal and stuff!
After much procrastination I finally got the car registered and took it over to Security Sound Systems in Haverhill for its mandatory pre-insurance inspection. I was not aware that such a beast existed but, apparently, used vehicles registered in MA must be documented and photographed to make sure all of their important bits are in place before the insurance company will sign off on a deductable for fire/theft/comprehensive.
The stereo installer who documented my car was extremely amused by the fact that it was almost completely stripped and got a laugh out of the fact that I had to pull the radio out of the trunk for him to photograph it for the insurance company. He was also impressed by my endevour…he mentioned that in the three years he’d been doing stereo installs I’m the first guy he’s seen who actually does racing other than drag racing or street racing.
When the pre-insurance inspection was finished I headed over for the state inspection. I rolled in, the technician got in the car and promply drove it up onto the 2WD dyno. It took about ten minutes to convince the technician that the car was, in fact, AWD and that firing it up on the dyno would destroy the center differential.
Once the 2500 RPM sniff test was run he checked the suspension and failed me because the car was too low to get the jack underneath it. I showed him the stock springs in the trunk and he passed me once, after pointing out the stripped interior, I convinced him that I didn’t want to be on the 5Zigens any more than he wanted me to be on them and that the car would be stripped and almost completely rebuilt within the month.